So many apologies for being MIA all week! I've been traveling and crafting away because my beautiful friend finally said 'I do' to the love of her life this past weekend. EVERYTHING - from the invitations, to the theme, to the venue.... was nothing short of magical. I was recruited to make these adorable personalized wedding party glasses as a gift for her bridal shower, and went home with another project to show off on their special day. I'm super impressed at how fab it came out, and I couldn't wait any longer to show you how easy it was!
*The Beetique is a participant in the Amazon Services LLC Associates Program, an affiliate advertising program designed to provide a means for sites to earn advertising fees by advertising and linking to Amazon.com.*

First things first - my heart nearly exploded at first sight of their invitations. Kelly & Michael both met overseas in Australia, so the whole "vintage travel" meets "rustic country" wedding theme couldn't be any more fitting. Not pictured: the RSVP card was a postcard.

My dress: XOXO Women's Fitted Sheath Dress in Lime


Outdoor reception at The Grandview in Poughkeepsie, NY. So beyond gorgeous and right on the Hudson, with views of the Mid Hudson Bridge. It was lit up red white + blue for 9/11. You can also grab my dress on Amazon here.
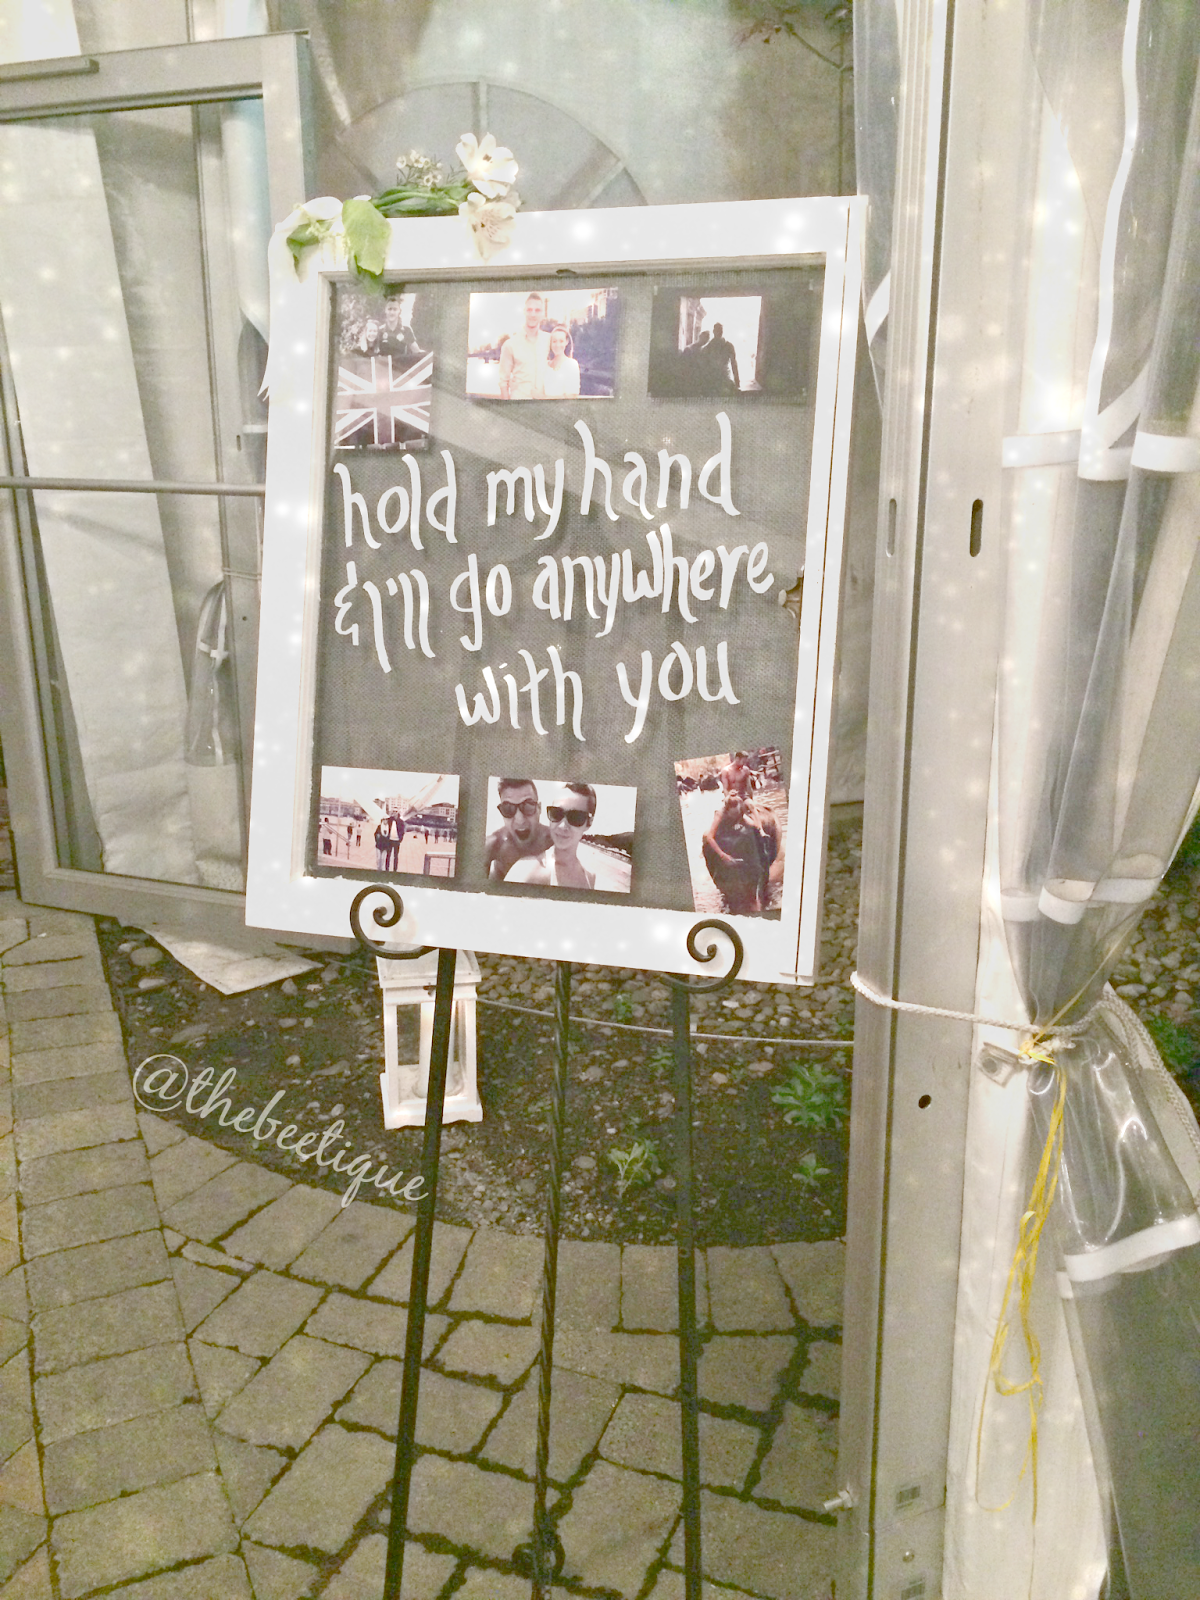
DIY inspiration via KaylaDanelle.com:

Here's what you'll need:
- 1 vintage window frame + glass
- Acrylic paint + paint brush (optional)
- Windex or multipurpose cleaner (optional)
- Burlap
- Staple gun
- Photos of choice
- Double sided tape
- Chalk marker
Step 1: Lay tarp or newspaper down and begin painting the window frame with acrylic paint. This step is optional. Once dry, be sure to to clean the glass front and back to wipe away any streaks, fingerprints, or paint.

tip: for a super rustic look, do not paint more than one coat.
Step 2: Place double-sided tape to each corner of the FRONT of your photos, and stick to the back of the glass. When looking at the front side of your window, your photos should be behind the glass.

Step 3: Lay the window face-down and lay your burlap over the back side, overlapping the frame about 1 inch on all four sides. Cut, then fold 1 inch of the burlap inward, and use your staple gun to secure it to the back frame.


Step 4: Have another person pull the burlap on the opposing side so the fabric lays flat, and staple away!

Step 5: The quote. Practice makes perfect!

chalk markers come off with Windex - it only took me two tries!
Voilà!


I am impressed by the information that you have on this blog. It shows how well you understand this subject. window washer
ReplyDeleteOn account of the dangers in question nonetheless, skyscraper window cleaning should just be endeavored by gifted merchants, and much of the time is best left to an expert window cleaning administration. Shine windows and eavestrough
ReplyDeleteThanks for sharing this post and visit my articles Gynecomastia surgery in Islamabad
ReplyDeleteThis comment has been removed by the author.
ReplyDeleteThis comment has been removed by the author.
ReplyDeleteVery nice. Only recommendation would be to use a squeegee. window cleaning toronto do that.
ReplyDeleteVehicle window tints are extremely normal particularly to we who redo a wide range of parts of a vehicle.
ReplyDeleteExpert Window Tinting